Replace text glyph shields with your own Illustrator symbols en-masse! What is this magic? We’ll use a custom shields file, a selection trick, and a script to make it happen. If this is interesting to you, read on..
When I make maps with Avenza MAPublisher, one of the common things that I need to do is place shield labels on roads. This is possible with an extra extension to the base MAPublisher license called MAP LabelPro. It’s worth noting that this requires an additional up-front cost and annual maintenance fee.
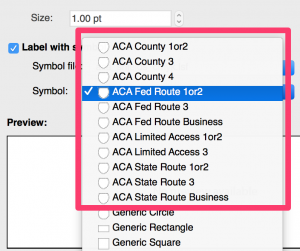
In the MAP LabelPro setup dialogue, you can choose from sets of pre-built shields to use:
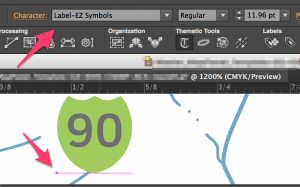
These are nice to have but have some limitations. They are actually generated from a bundled .ttf font file, and the shield objects themselves are hard to deal with because of this. Note the shield underlined like a text object and the Label-EZSymbols font associated with it:
I need a lot more control over the style of the shields (as I expect most cartographers do), so the options are to: (1) make your own custom ‘shields’ .ttf font files (export your .ai shield art to .svg and turn it into a .ttf file) or (2) find a way to replace the ones that are placed with MAP LabelPro with your own normal .ai shield symbols. I attempted option 1, but it turned into a ton of fiddly conversion work, time wasted, and the end product was still a text object that I didn’t really want in the first place. So, option 2 is what we’ll work out below.
- Make a custom .lsf file for your shields. Navigate to your MAPublisher prefs (Illustrator>MAPublisher Preferences). Click on MAP LabelPro and see where your rules, styles, and symbols are at. By default this is set to:
/Applications/Avenza/MAPublisher 9.9/MAPublisher Plug-in/LabelPro/Symbols/I highly recommend setting this in a custom location on your disk. Then you can keep track of everything, make it a git repo if you want to, and not lose it all when upgrading MAPublisher versions.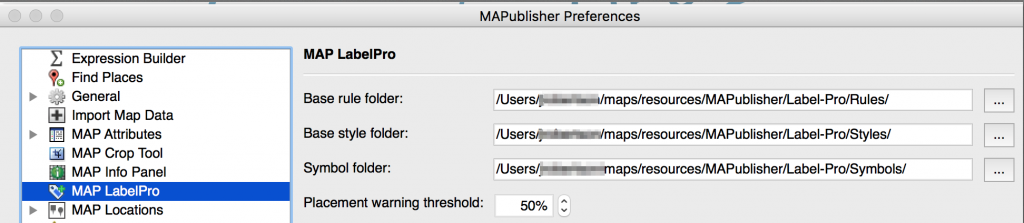
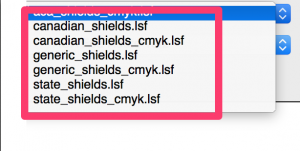
Make a copy of the .lsf file that best matches your use case. I make print maps, so ‘generic_shields_cmyk.lsf’ will work for me.
 Name it something that you will recognize. I’ll name mine ‘aca_shields_cmyk.lsf’
- Edit the .lsf file with custom shields. Crack open your new .lsf file in your favorite text editor. This file describes the properties of each symbol. Let’s look at one below:
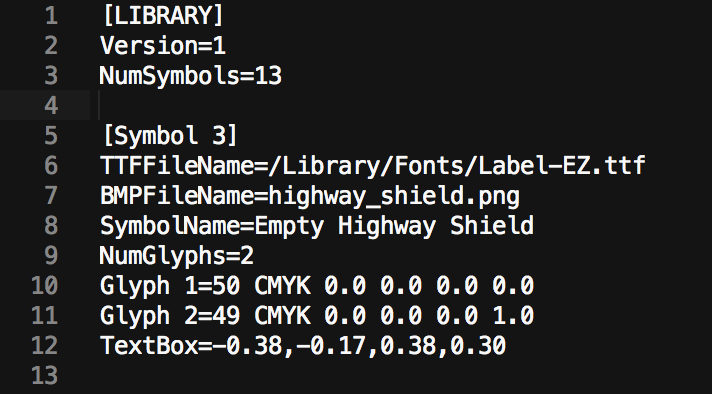
- The first three lines are the header info. Leave everything as-is. The only thing to take into account here is that as you build your .lsf file with different symbol sets, you need to set NumSymbols=XX to the number of symbols in your file.
- Each block of code after that represents the properties of a single shield. For the example above:
- Line 5: the number of the symbol in the file. sequential from top to bottom.
- Line 6: the link to the .ttf file with the shield text objects. leave this alone.
- Line 7: the link to the shield .png file. this is just the display icon in the MAP Label Pro dialogue. leave this alone.
- Line 8: the name of the shield that will appear in the labelPro dialogue
- Line 9: The number of glyphs that make up the shield. it’s important that this matches the glyph defs coming next
- Line 10-11: the glyph ids coming from the .ttf file in windows 1251 character encoding (ie-“1=50”) followed by C,M,Y,K values for the glyph
- Line 12: the alignment of the text on top of the shield. (left,bottom,top,right)
- That is kind of a mess, but not to worry, we are going to keep it simple. Remember that these text shields are just a method to get objects into our illustrator document. we’re going to replace them with our own illustrator symbols. All we really care about is the SymbolName, NumGlyphs, and CMYK value.So, copy one of those blocks and edit it:
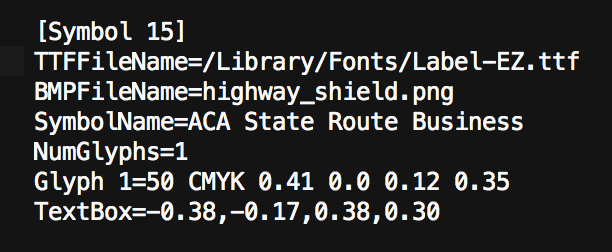
- Set Your SymbolName to represent one of you .ai shield symbols, ‘State Route Business’ in this case.
- Set the NumGlyphs to 1. this is important because we want to keep the replacement simple and a single glyph is easy to target.
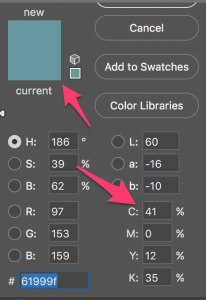
- Set Glyph to “1=50 CMYK *CMYK values*”. This example represents a grayish blue 41,0,12,35. We’ll use this color to represent all shields on our map that we want to use our State Highway Business Route shield for. Yours will likely be different. This is important because we will use this color as a target later on during the replacement. I’m not sure why there is a leading ‘0.” in front of the CMYK value–just roll with it.
- You’ll repeat this process for each shield that you want to be able to place with LabelPro and then replace with one of your own symbols. Remember to number the symbol entries sequentially, and then edit the header with the number of symbol entries that you have in the file.
- Setup LabelPro with your shields. Open up a MAPublisher document with some road data that you want to label with. In a perfect world (haha) you’ll have an attribute representing the shield type (State/Federal/County, etc) and another with the number of the route. Click the LabelPro button, add your line layers, setup your attributes and sql, and then in the “Label With Symbol” section:
- You should see your new .lsf file represented:
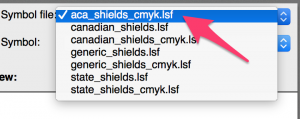
- And all of the shield entries that you made in the file:
- You should see your new .lsf file represented:
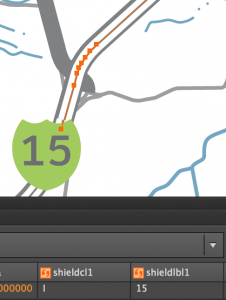
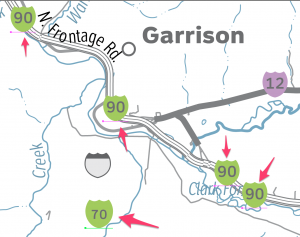
- Label! Run your LabelPro rules and check out your output. Remember that the goal here is to have a shield placed with a single glyph, with a fill color representing a certain class of shield that we want to replace with our own shields. For example, below I’ve used this green color to represent a shield class of “I” (interstate), and a value that is 2 digits long:
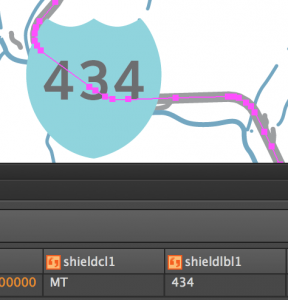
I’ve used this blue color to represent a “MT” (or any State Route), and a value is 3 digits long:
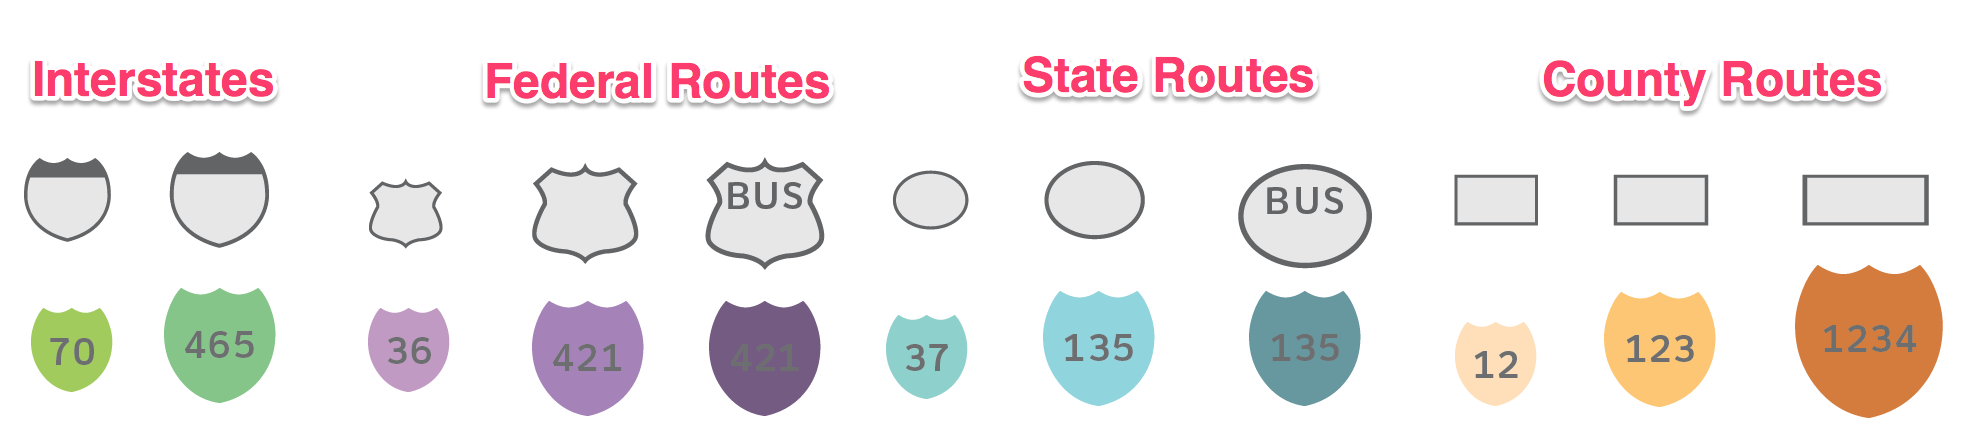
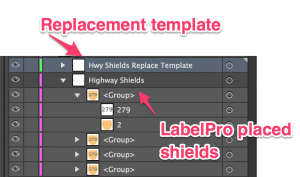
- Setup Replacement Key. Now you have a map full of strangely colored shields. Make a new layer that will serve as the replacement ‘key’. This will be something that you want to keep around to copy/paste into new documents or integrate into your template files. It should contain an instance of the text symbol (from your recently placed shields) and the corresponding illustrator symbol. Mine looks like this. It’s grouped by route type and the number of digits in the label string:
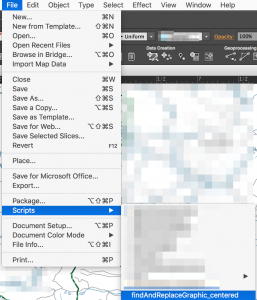
- Download and install find/replace script. The great and generous cartographer, Nathaniel Kelso, wrote some illustrator scripts way back in the day and graciously shared them with the world. We’ll use one of them to do this replacement. Download his scripts git repo here. The one we’re interested in is the “findAndReplaceGraphic_centered.jsx” file. Install this file (or all of them) into your Scripts Folder. This is something like: “/Applications/Adobe Illustrator CS6/Presets.localized/en_US/Scripts” Yours might vary slightly. Once it is there, it should be available in your File>Scripts menu.
- Do the Replacement Already! Ok, finally, let’s do this. You will have a MAP Text Layer containing all of the text shields that were placed by LabelPro. Drag the layer that represents your replacement key in a layer above the shield layer. It’s ok that the text is grouped with the shield object–This script is smart enough to work through the groups. It should look something like this:
Direct-Select one of the shields in your replacement template layer. The key here is to select only the text symbol object (and the corresponding fill color). With that selected, Go: Select>Same>Fill Color:

All of the shields across the map with that fill color (and road designation) should be selected. It doesn’t matter if they are in multiple layers or MAP Text suppression layers:
- Now, Shift+click (to add to the current selection) the illustrator symbol that represents the class of shields you currently have selected. This symbol should be ABOVE the text symbol instances in the Replacement template layer. Go: File>Scripts>findandReplaceGraphic_centered
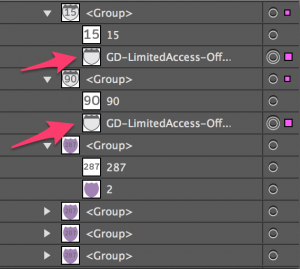
- Done! The script may chug a little bit, but just give it time. I’ve used it on huge maps with hundreds of replacements and it always works if you just let it be. If you look at the shield objects in the layer list, you’ll see that the illustrator symbol has replaced the text symbol inside the group with the text string:
Repeat for all the other shield colors/classes, and you should have a map with your own illustrator symbols ready to work with: